
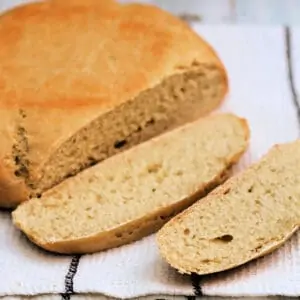
Cheese bread rolls are delicious with picnics in the summer, served alongside salads and ham/salami/roast chicken, or with soup in the colder months. If you love cheese these are to die for!

The rolls have a lovely cheesy flavour so I thought I’d share them here with you.
I’ve become much more confident with making bread since the sweetened dough bread-making class I went to recently.
We did lots of kneading, bread shaping and more.
If you like making bread but don’t really get around to it, I really recommend a class as it can give you just the push you need to get baking.
You only need a few store cupboard ingredients and some cheese to make these cheese rolls, so why not try them out.
They didn’t require a lot of hands-on time, just ten minutes kneading and five minutes shaping later on.
You can have them ready for lunch if you start just a couple of hours earlier.
And you can’t beat the satisfaction of making your own bread, without all the additives you get in some shop-bought bread.
Ingredients
Here is what you will need for this recipe. Get the exact quantities in the recipe card further down.
- strong bread flour – make sure you use strong flour intended for making bread. It produces more gluten which means it is stronger and can hold shape when the yeast is activated.
- salt – a key ingredient in bread to add flavour (would taste very bland without).
- easy-bake yeast – similar to instant yeast this is the kind of yeast you get in a small tin from the baking aisle.
- butter – enriches the dough.
- water
- milk – also enriches the dough.
- egg – used again to enrich the dough and also for the egg wash before baking.
- cheese – I use cheddar, you can use medium or mature (sharp) as is your preference. See variations below for more cheeses to use.
- oregano – this herb sets off the cheese flavour.
Method
- Place the flour in a large bowl and add the salt on one side of the bowl and the yeast on the other.
- Rub in the butter roughly then add half the egg. Keep the rest for egg wash before baking.
- Add the milk and water and mix until the dough forms a ball.
- Knead the dough for ten minutes until it is smooth and elastic. Add two thirds of the cheese, and the oregano during kneading,
- Place the dough in a bowl covered in clingfilm to prove for 45 minutes to an hour.
- When the dough has risen, take it out of the bowl and press it all over with your fingers to knock it back. Form it into a ball.
- Split the dough in half using a scraper and then split each half into three.
- Form each piece into a sausage shape, roll it up into a spiral and press down on top.
- Place each roll on a baking sheet to rise again, for 45 minutes to an hour. Preheat the oven to 200°C / 390°F. Place a deep roasting tin in the bottom of the oven.
- After the second rise, you should see the rolls have doubled in size.
- Before the end of the second rise, fill and boil the kettle.
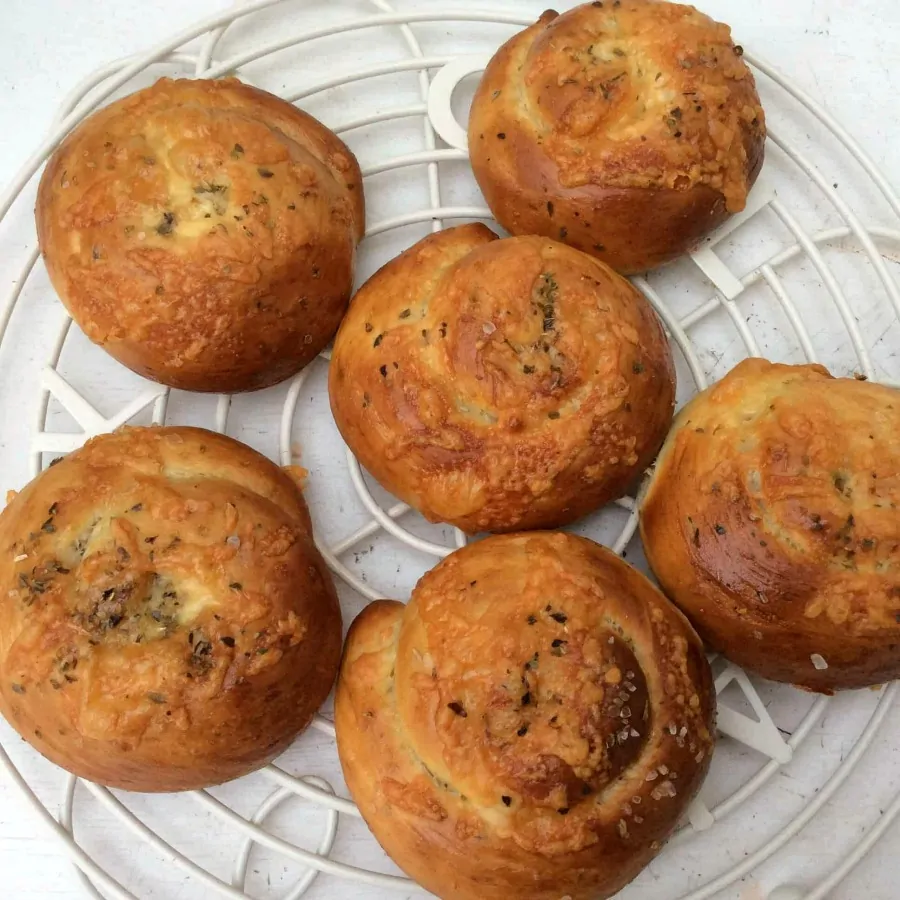
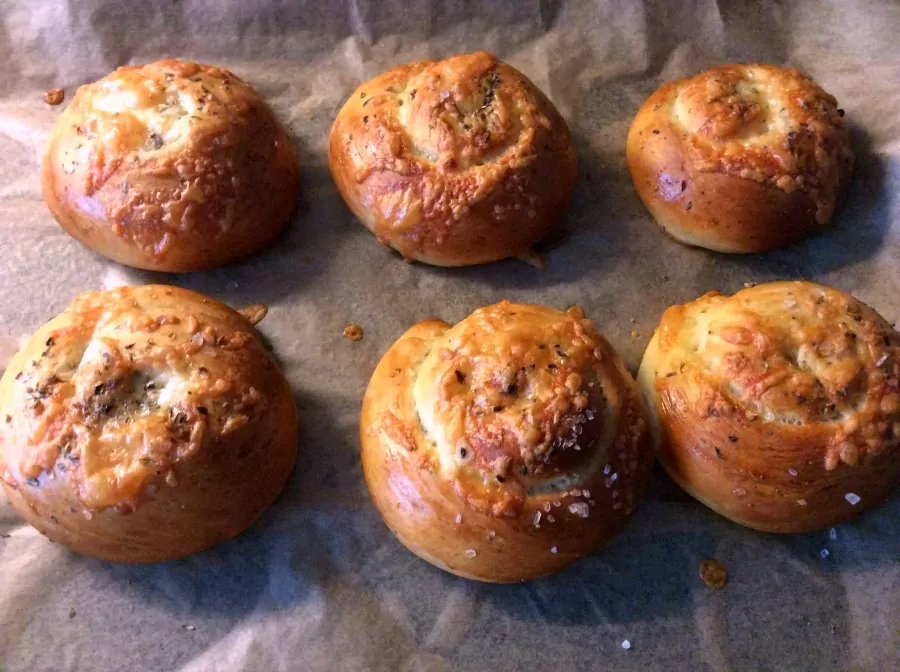
- Brush the rolls with the leftover egg, and top them with the rest of the cheese, some coarsely ground salt and another sprinkle of oregano.
- Pour an inch or so of boiling water into the hot tray in the bottom of the oven, then quickly place the rolls in the oven.
- Bake for 15 to 20 minutes until golden brown. Tap the bottom of the rolls to check if they are baked through. It should sound hollow if they are done.
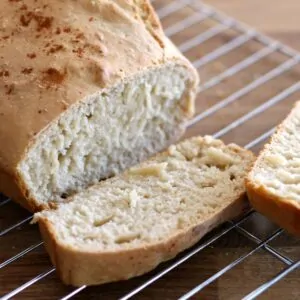
How to shape the bread rolls
Shaping these cheese bread rolls with herbs is not that difficult.
After the first rise, split your dough into two pieces, then each piece into three, so you have 6 equal pieces.
Form each small piece into a sausage shape by rolling it out and then form into a spiral, a bit like a snail shell but on its side.
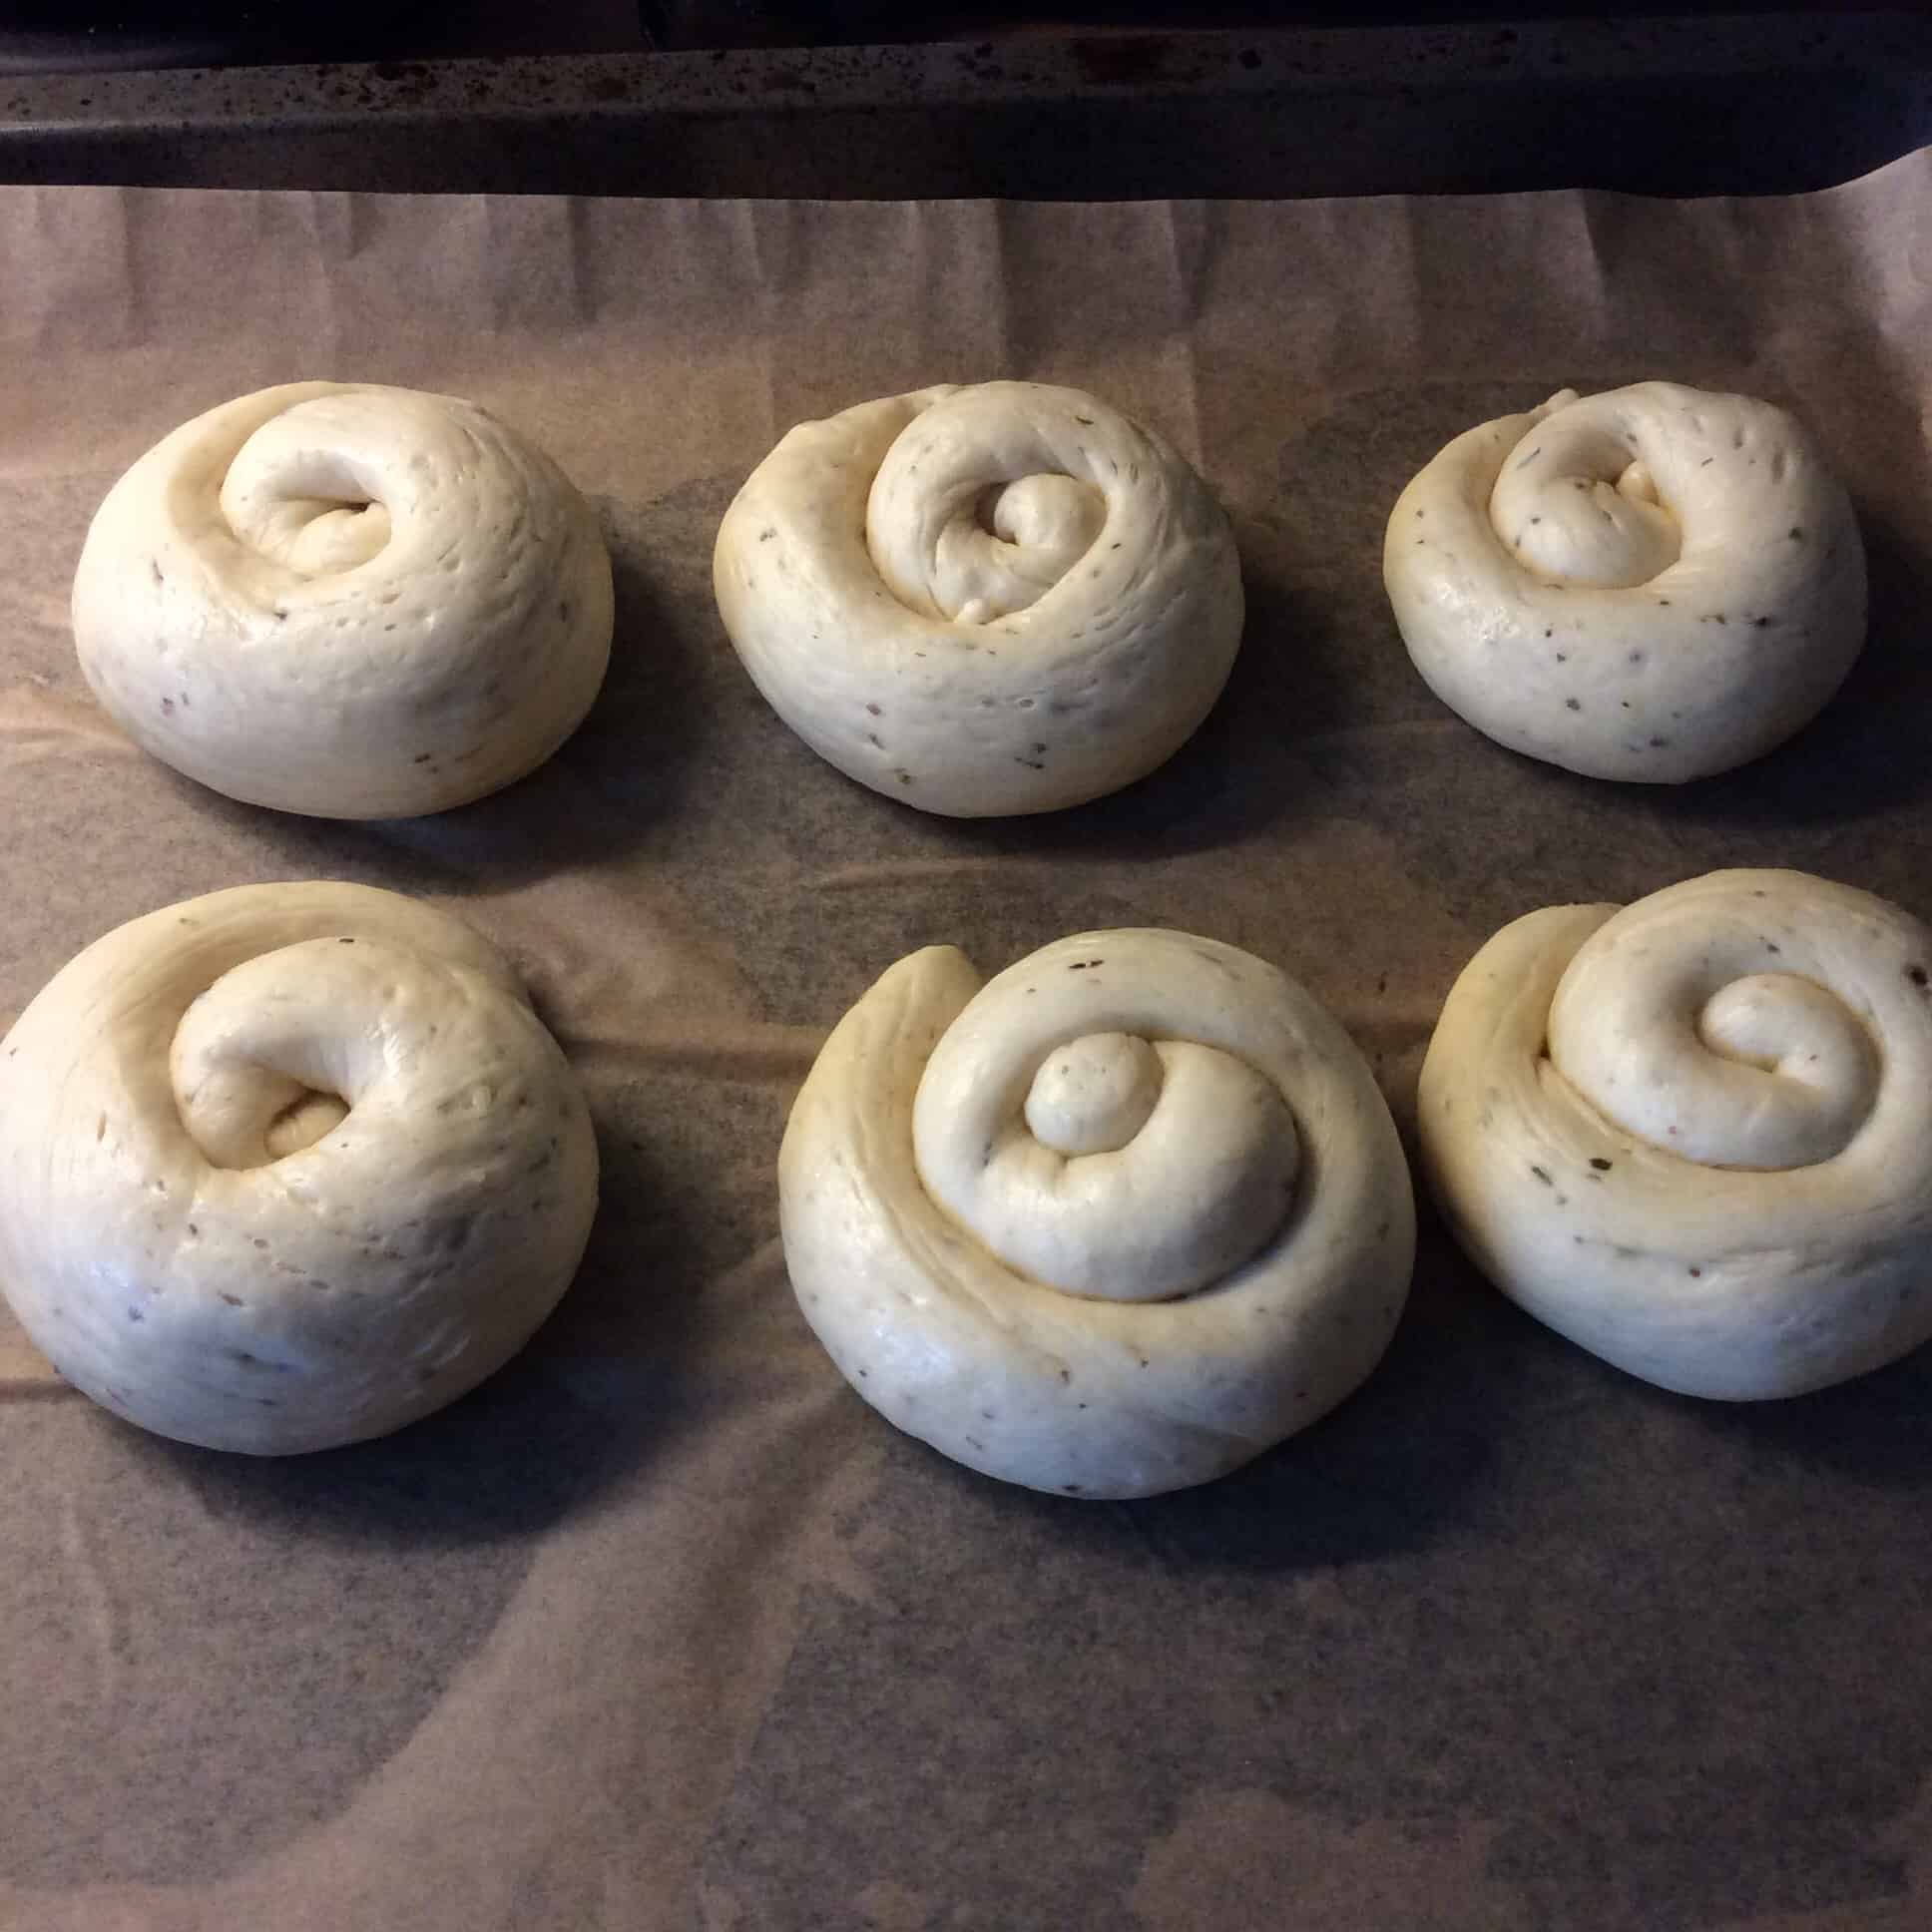
Leave to rise again. After baking they keep their shape beautifully.
More cheesy breads
For more cheesy bread ideas to try, how about these:
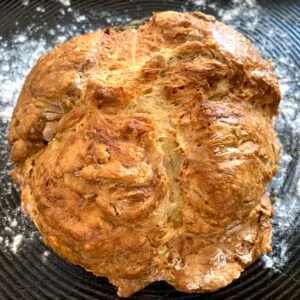
- Mozzarella and herb soda bread
- Cheddar and dill beer bread rolls from Tinned Tomatoes
- Wholemeal cheddar and apple chutney soda bread from Fab Food 4 All
Recipe

Cheese Bread Rolls with Herbs
Ingredients
- 225 g (1¼ cups + 2 tbsp) strong bread flour
- 0.5 tsp (½ tsp) salt
- 1 tsp easy-bake yeast
- 27 g (2 tbsp) unsalted butter
- 60 ml (¼ cups) boiling water
- 60 ml (¼ cups) milk
- 1 egg
- 50-100 g (½ cups) cheddar cheese I used medium cheddar
- 2 tsp oregano
Instructions
- Place the flour in a large bowl and add the salt on one side of the bowl and the yeast on the other.225 g / 1¼ cups + 2 tbsp strong bread flour, 0.5 tsp / ½ tsp salt, 1 tsp easy-bake yeast
- Rub in the butter roughly then add half the egg. Keep the rest for egg wash before baking.27 g / 2 tbsp unsalted butter, 1 egg
- Add the milk and water and mix until the dough forms a ball.60 ml / ¼ cups boiling water, 60 ml / ¼ cups milk
- Knead the dough for ten minutes until it is smooth and elastic. Add two thirds of the cheese, and the oregano during kneading,50-100 g / ½ cups cheddar cheese, 2 tsp oregano
- Place the dough in a bowl covered in clingfilm to prove for 45 minutes to an hour.
- When the dough has risen, take it out of the bowl and press it all over with your fingers to knock it back. Form it into a ball.
- Split the dough in half using a scraper and then split each half into three.
- Form each piece into a sausage shape, roll it up into a spiral and press down on top.
- Place each roll on a baking sheet to rise again, for 45 minutes to an hour. Preheat the oven to 200℃ / 390℉. Place a deep roasting tin in the bottom of the oven.
- After the second rise, you should see the rolls have doubled in size.
- Before the end of the second rise, fill and boil the kettle for boiling water.
- Brush the rolls with the leftover egg, and top them with the rest of the cheese, some coarsely ground salt and another sprinkle of oregano.
- Pour an inch or so of boiling water into the hot tray in the bottom of the oven, then quickly place the rolls in the oven.
- Bake for 15 to 20 minutes until golden brown. Tap the bottom of the rolls to check if they are baked through. It should sound hollow if they are done.
Linking up with Bready Steady Go with Jen’s Food and Utterly Scrummy Food for Families.
Jen @ Jen's Food says
Mmm I love cheese in bread and I really like the swirled shape you’ve given them, will have to try that next time I bake a batch. Thanks for linking to my recipe and joining in with Bready Steady Go 🙂
bakingqueen74 says
Thanks for hosting Jen, it is great to keep me baking bread in some form each month
sarah says
I could smell these baking whist reading your post. I would love to go to a bread making class someday. 🙂
bakingqueen74 says
You should, they are such fun. Three hours of baking and loads of goodies to take home!
Kirsty Hijacked By Twins says
Oh these look so good! I really do need to get baking bread again! x #bakeoftheweek
bakingqueen74 says
Thanks Kirsty x
efwalt says
You can’t beat home made bread can you! These look fab. Perfect for chucking into the picnic basket too!
kerrycooks says
These look so delicious! Love the swirls shape too
Elizabeth says
This sounds like the perfect summer picnic bread – yum!
Camilla says
Oh these rolls just look divine and I bet they tasted superb too:-) Thanks for linking to my soda bread:-)